i hope it goes well too, i dont think you can go too big on the hoses only too small as the oil pressure/volume to the cams looks to me like its regulated by the size of the oil hole in the cam cap, after that point the oil flows into the oil gap between cam and cam cap, but most will go into the cam and out through the cam lobe hole… well that’s my theory anyway.
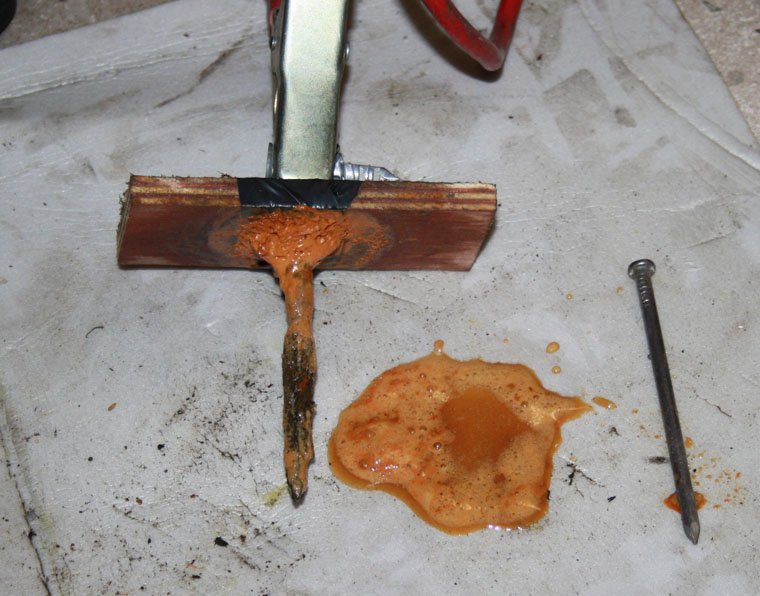
there’s one thing for sure, my original top end oiler hoses are more restrictive than the old original vf rigid pipe work, i did a test with both coupled up to my fe engine, did three 8 to 10 second bursts on the starter motor and collected the oil, the original rigid pipe work allowed twice the amount of oil through…thats why i removed the top end oiler from my FE, I’m not an engineer or a mechanic, my experiment may be flawed in some way, the people who designed these original kits know far more about oiling systems than i do, I do sometimes wonder though, the original kits were (i think) designed for the vf750 and early vf1000 interceptor (fe) which would have been fitted with cam caps with the smaller oil hole’s in them, did any of the many top end oiler manufacturers up the size of the pipe work when honda increased the oil flow capacity through to the cams on the ff and probably RF models.
hi Fred,
the pipe work came to £50 and included the blue straight and 90 degree connectors, i took my pipe work through to them as i couldn’t explain to them over the phone what i needed, they made the pipework up while i was there, the pipe size is -4 on there size chart, which was the next size up.
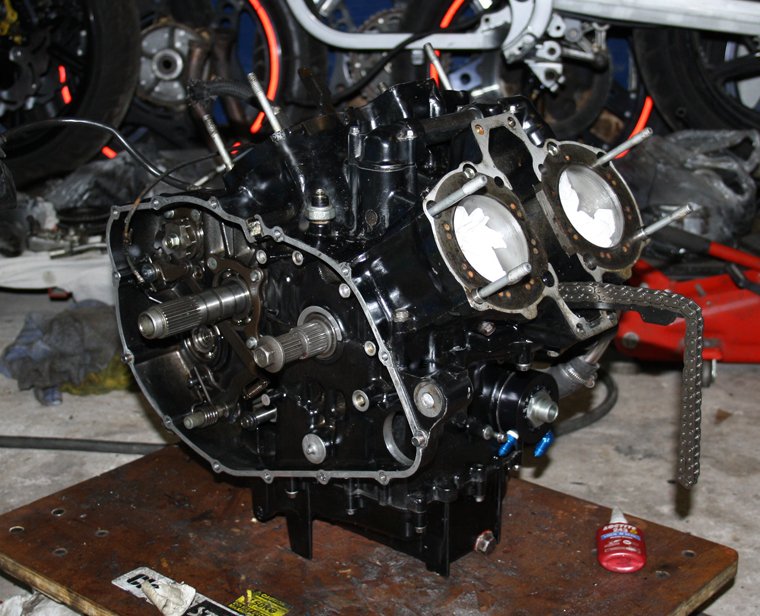
rebuilt as much of the engine as i can, just got to wait for my cams to return,
the rear head needs a good clean up, will remove and re-lap the valves, new stem seals. already done the front head.
spent an hour mooching around in the garage this afternoon looking for something interesting to do, looked at the part rebuilt engine… “nope, nothing to be done on that till my cams return”,
so decided to attack some of the paint work, i was originally going to try mask the decals up and spray around them, but on reflection i don’t think that’s going to work very well, the matching red/black FE nose cone fairing wont fit properly on the FF anyway, it doesn’t have a cutout on the left hand side for the radiator hose, fortunately i have a left hand FF piece, so its going to be a pick and mix fairing. the tail unit also needs a bit of repair. so the plan is now to get everything flatted off, repaired and primed, by that time i should have made my mind up on a colour scheme (i like the red/black…but don’t like the idea of spending 100 smackers on a decal kit :-[)
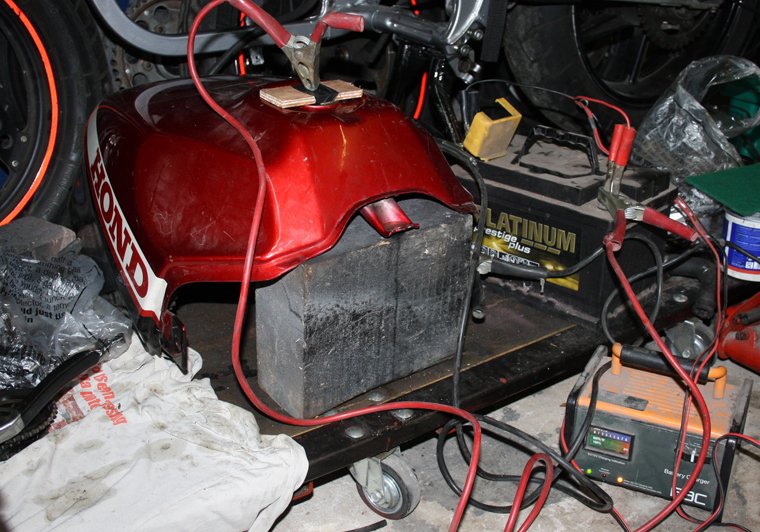
So decided to start on the petrol tank as its probably going to be the most work as it needs de-rusting too,
had read an article in practical sports bike about de-rusting the tank with bicarbonate of soda and electrickery, which sounds good to me, none of that filling it full of nuts and bolts and using it like a giant cocktail shaker
Tank filled up to brim with bicarbonate of soda and water, battery and battery charger on
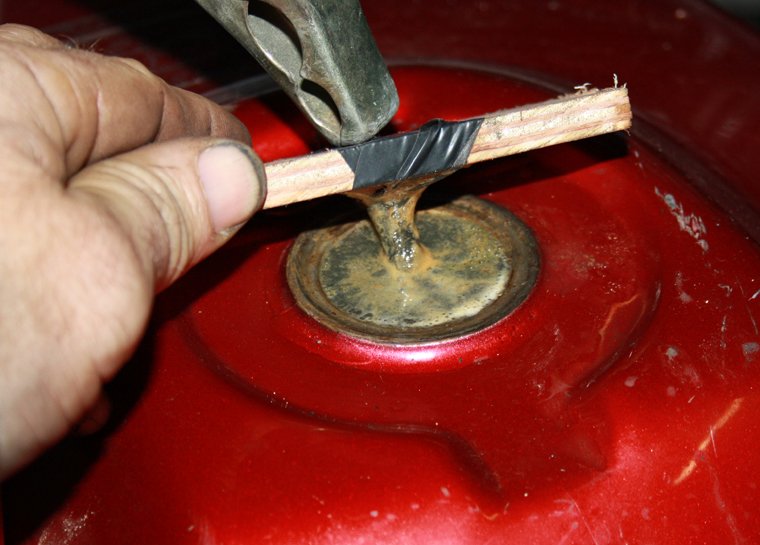
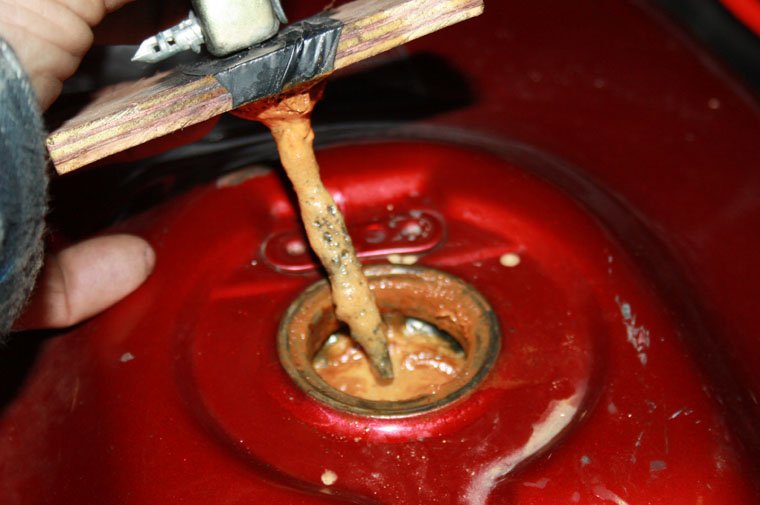
well, 5 days gone and the tank is still erupting a mixture of rust and black silt from the fuel hole, the nail anode was far too small so changed it for a piece of 30x5mm flat bar about 100mm long, i dont know where all this crud is coming from as i swilled the tank out before i started…
hi fred,
you may be right, the article’s and you tube vid’s i’ve watched are a bit vague about “how long is long enough” most seem to suggest that 2 days should be enough to clean a tank, the article in practical sports bike suggested that the reaction was done when it stopped fizzing…
if its not stopped fizzing by tonight i think i will empty the contents out into a bucket and have a look whats going on.
emptied the tank out into a 5 gallon bucket, all the visible rust inside the tank has either gone or turned black, there’s about 2 inches of black sludge in the bottom of the bucket, i dont think its actually silt i think its more likely to be rust particles that’s turned black with the electrolysis process…
cleaned and dried the inside of the tank and sprayed with WD40
Hi Pete I did pm you but I presume the gremlins are playing around again I have found the seat lock and cable and the mounting bracket, also the ignition switch and eventually the key only thing I have found is the key is quite worn so will need a recut at some point, works fine in the ignition and seat lock but not so well on the tank lock can you pm me your address and I will post them off for you
hi paul,
thanks for that, ive PM’d you my details and my normal email address if you want to email me on that, let me know what you want for the bits and ill send some wonga over,
I have some new keys here 2 off C63 and 1 off C68
It’s a long story involving a BolDor in bits and a blind man
If they are of use to anyone I will take £5 each and post FOC
Regards Bif
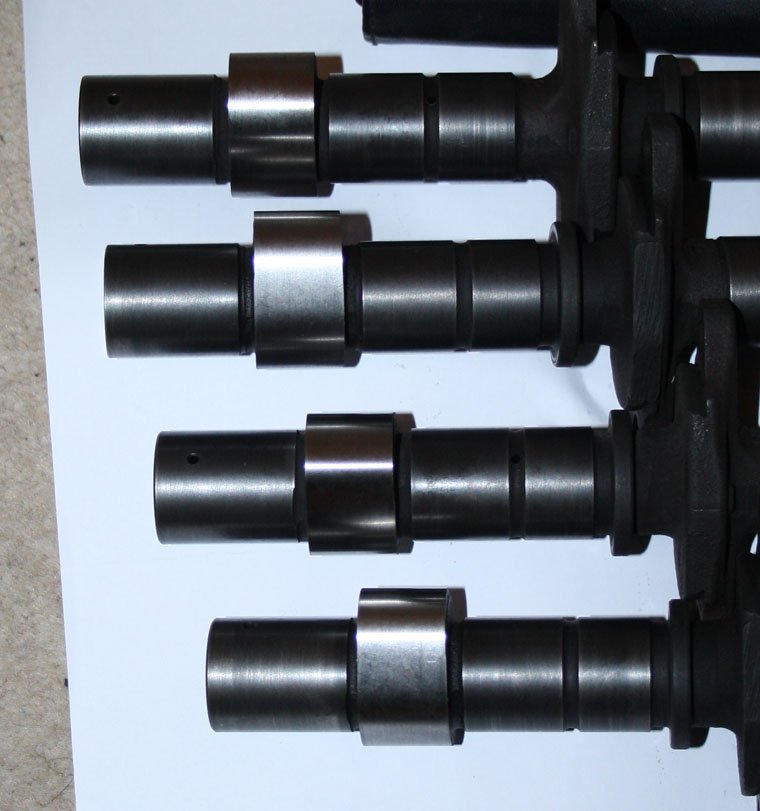
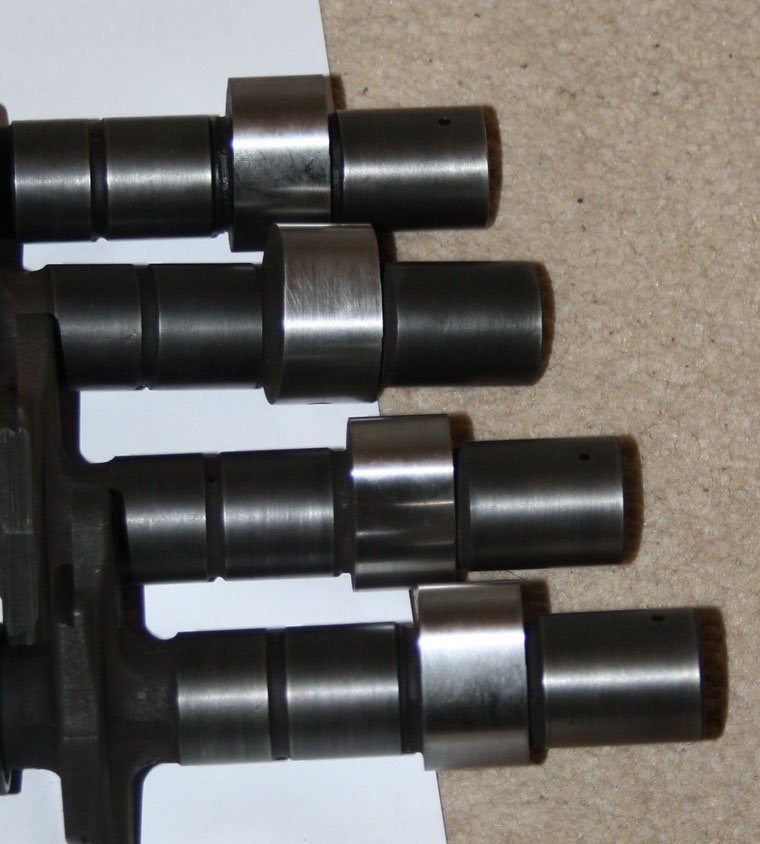
well, finally got my cams back from SEP kegworth, im not too sure what to make of them really, i imagined that the freshly ground lobes would have been more polished and shiny, i know when i had my last crank done there i could see my reflection in the re-ground crank pin, maybe its different for cams ?
Hi Pete the cams look fine to me when I used to build rover v8 engines and fit piper cams and kent cams they were quite dark on the lobes and were as clean as the journals the quality of the regrind looks fine to me how much in total was it to have done could do with sending mine off so I have a spare set for my engine
hi paul, thanks for the reassurance, i’ve given them a good wipe down with WD40 and they look a lot cleaner, the guy who did the grinding on them has had the end plugs out and swilled them through.
So this weekend i will be refitting the heads and getting the engine back in the frame,
the cams came to £288 including the vat, which is a fair chunk of money but at least i know they are ok now,
Decided to have the weekend in the garage to get the engine back in the frame, all was going well on Saturday, got the cams, tensioners and heads all in and torqued down, set the valve clearances, thought to myself “just enough time to get the engine in the frame now” So, get’s the engine up on the trolly jack, a little bit of maneuvering and it slid in to the frame a treat, “Brill”, frame rail on, tightens all the mounting bolts up…
By this time it was about 10pm, so decided to put the spanners away and tidy the garage up so I can get the van back in…… then I noticed something on the floor… the rear down pipes, well there’s nothing like a dose of mechanical mupetry to fetch you back down to earth with a bump.
After about ten minutes of swearing at myself, and the bike, I decided the best course of action was to remove the swingarm and rear shock in the morning and get the rear pipes in that way…
Sunday morning, swingarm off, it was only on finger tight as it needs to be sprayed, the rear pipes only just squeeze in that way, and getting to the exhaust nuts is pretty tricky, in hindsight it would have been easier to take the engine back out… anyway, goes to put the swingarm back on and notices the linkage was jamming up at a certain point… after further investigation I found that one of the needle bearings has broken up… They aren’t listed on the vf parts list, managed to get one out in one piece so I can measure it.
(15x22x25 if ive measured it right… part number HMK 1525) Simply Bearings have them listed at about £12 each,